
Deploying a new VPS
What this is
Adding another VPS to your account from Deploy in the client area (https://vpsdime.com/deployvps). You pick a plan, choose where it runs and what OS it starts with, add anything extra you want, set up how you'll log in, and it's live within a few minutes, billed on your existing account. The flow is the same for Linux VPS, Premium VPS, and Windows VPS; the few places they differ are called out below.
You don't have to get every choice perfect. Almost everything here can be changed after the fact (resize the plan, reinstall a different OS, add resources, set an SSH key), so pick sensible defaults and move on.
1. Pick a plan
Open Deploy, choose the product group at the top (Linux, Premium, or Windows), and pick a plan. Each card lists what you get: vCPU, dedicated memory, SSD storage, monthly traffic, an IP, and the uplink.
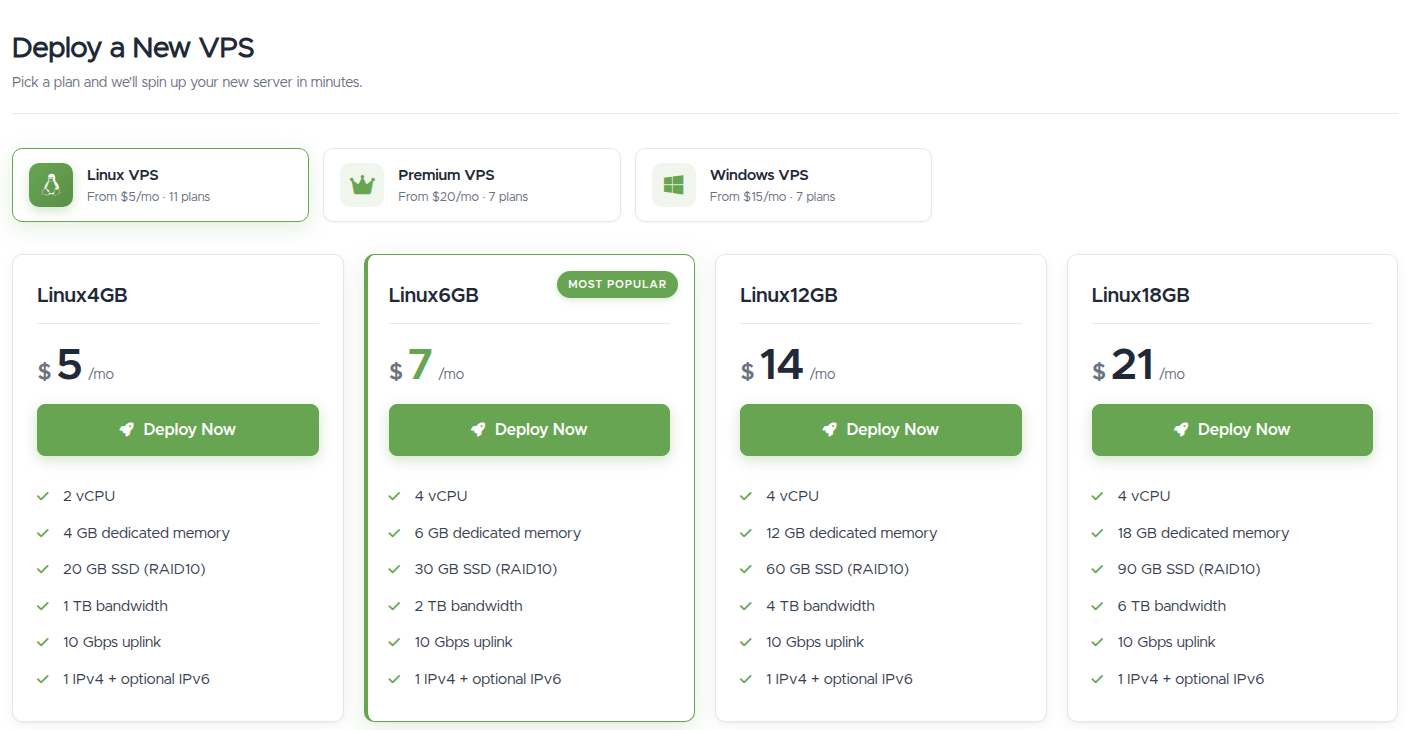
- Don't overthink the size on Linux or Windows VPS. Start with what fits your workload now: you can move up or down later, and on Linux VPS a plan change is live and instant with no downtime and the same IP. On Premium VPS, size deliberately, it's upgrade-only, so you can grow but not move to a smaller plan later. See Upgrading or downgrading.
- Which product group? Linux VPS is the general-purpose choice. Premium VPS gives fully dedicated resources. Windows VPS runs Windows Server and you connect over RDP. The "Most Popular" tag is just a hint, not a recommendation for your case.
Clicking Deploy Now on a plan takes you to its configuration page.
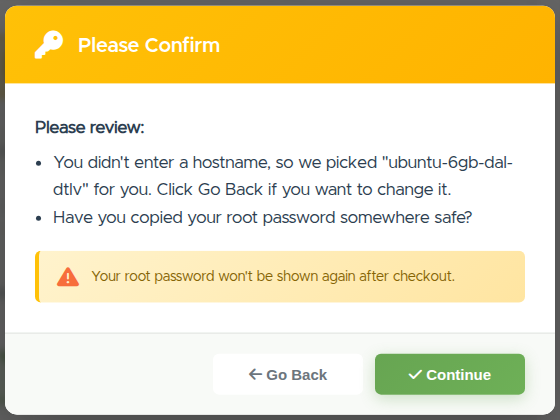
2. Name it and note the password
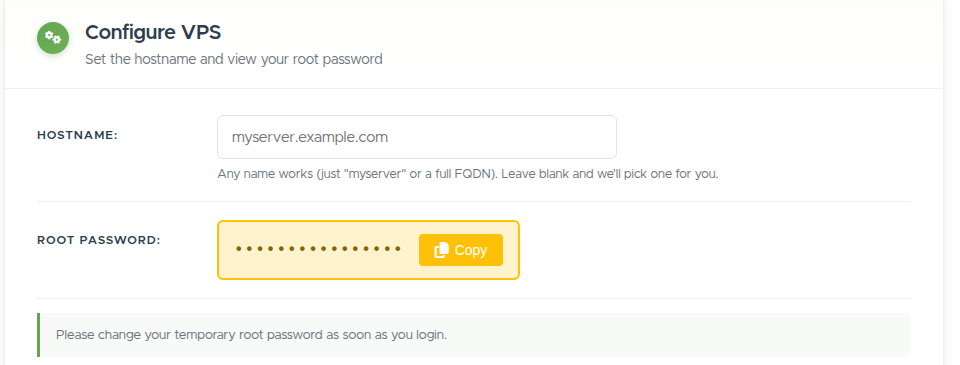
- Hostname (Linux and Premium) or Label (Windows) is optional. Leave it blank and we'll pick one for you; a hostname can be a short name (
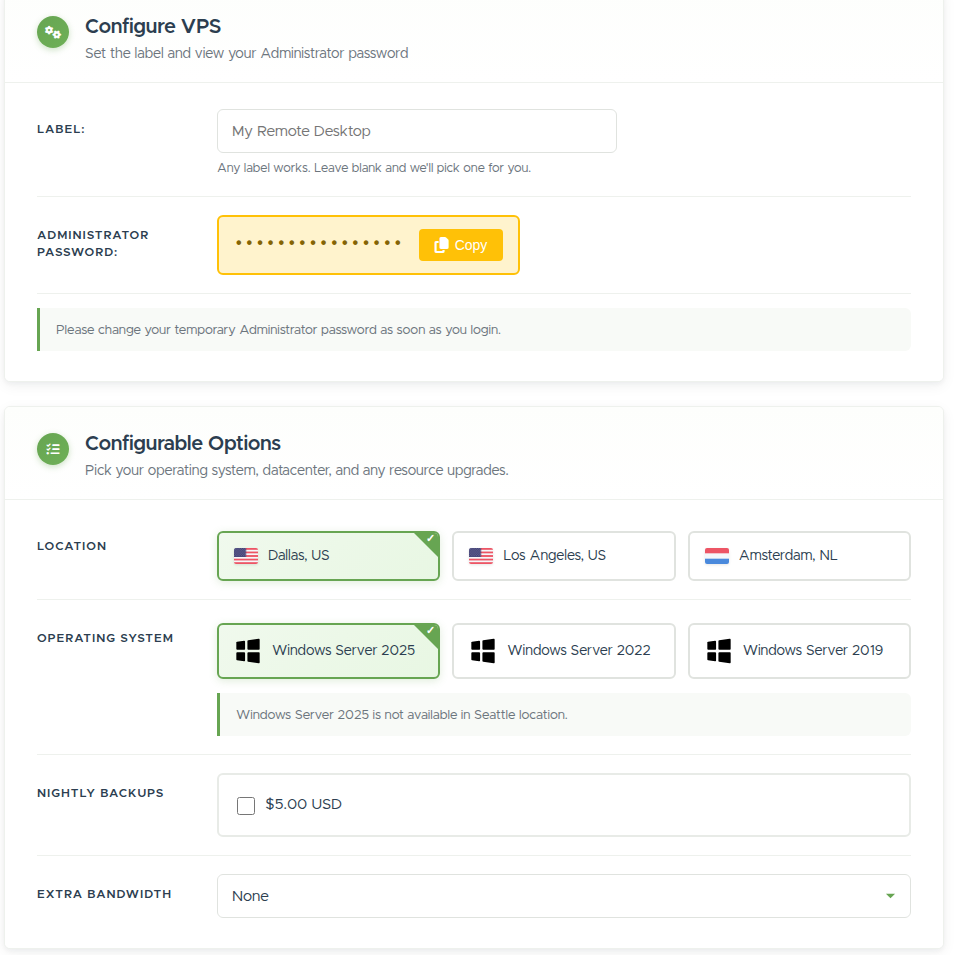
myserver) or a full domain. The label on Windows is just a friendly name for the service, it doesn't name Windows itself. - A temporary Root password (Linux and Premium) or Administrator password (Windows) is generated and shown once, with a Copy button. Save it somewhere safe and change it the first time you log in. If you set up an SSH key (below), you may not need this password at all.
3. Choose a location and an OS
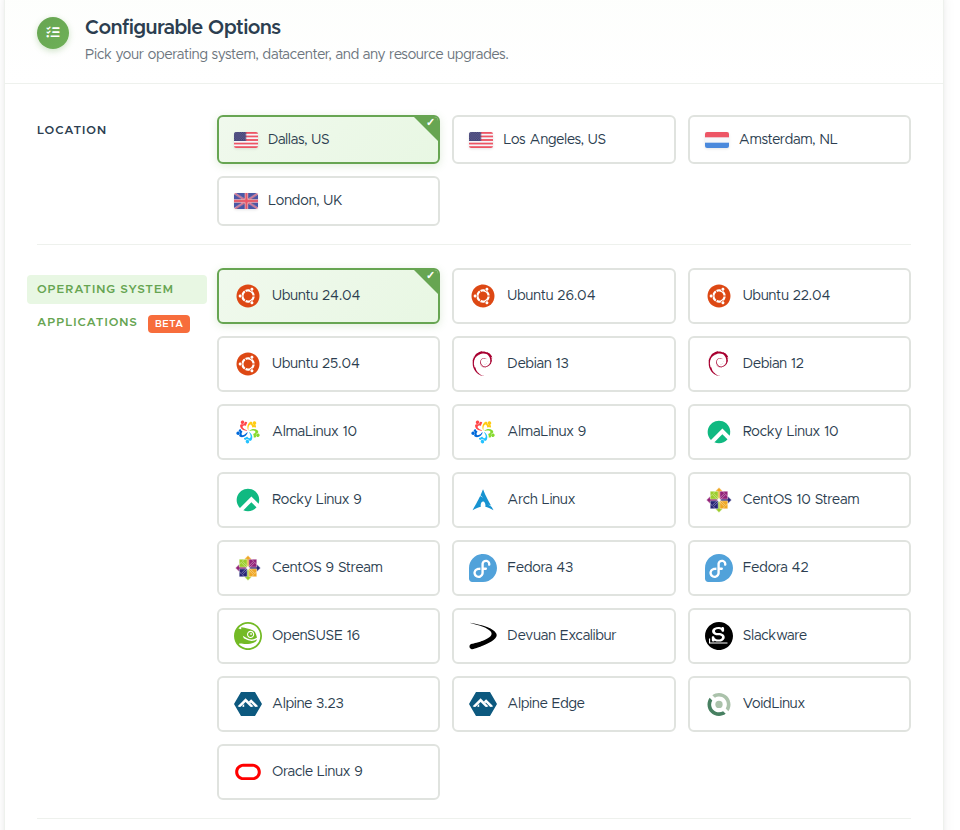
- Location is where the VPS physically runs, and it sets the region of your IP address. Pick the datacenter nearest your users for the lowest latency, and if you're not sure which that is, our Looking Glass lets you ping and download from each location before you decide. Your IP belongs to the location, so changing location later means a migration that changes the IP, worth choosing deliberately now. (That said, a wrong pick isn't costly to undo: if you realize right after deploying and haven't used the VPS yet, contact us and we'll re-provision it in the right location for free; the $4 migration fee only applies once you have data you want moved.) We run six datacenters, Dallas, Seattle, Los Angeles, New Jersey, London, and Amsterdam, and the form lists the ones currently in stock for your product; an out-of-stock location returns as soon as we add capacity.
- Operating system:
- Linux and Premium: pick a distribution. A current LTS release (Ubuntu LTS, Debian, AlmaLinux, or Rocky) is the safe default for most people. Linux also has an Applications (beta) tab if you'd rather deploy a common app stack pre-installed than a bare OS.
- Windows: choose Windows Server 2025, 2022, or 2019.
- Not sure, or want to switch later? You can reinstall to a different OS any time (it wipes the VPS, so it's cleanest to get close now).
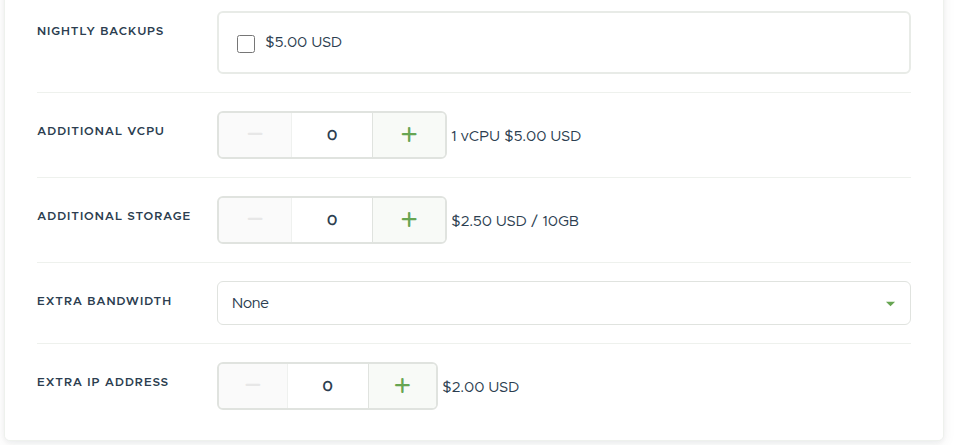
4. Add resources now, or later
The configuration page offers optional extras. Which ones appear depends on the product:
- Linux VPS: Nightly Backups, Additional vCPU, Additional Storage, Extra Bandwidth, and Extra IP.
- Premium VPS: Extra Bandwidth and Extra IP (backups are included free, and CPU and storage are fixed to the plan).
- Windows VPS: Nightly Backups and Extra Bandwidth.
You don't have to decide all of this now. Most extras can also be added later from the VPS's Extra Features tab, and Linux upgrades are live, so add only what you know you need up front. The one worth turning on from the start if your data matters is Nightly Backups.
5. Set up how you'll log in
Linux and Premium have an Optional Configuration section for SSH:
- Root public SSH key: pick one of your saved keys, paste one, or import from GitHub/GitLab. See SSH Keys.
- Root SSH login mode: Login Using Password (also allows a key), Login with SSH Key Only, or Disable Root Login. Key-only is more secure, but choose it only if you've actually set a key, or you'll lock yourself out.
- Optionally create a user with its own password, key, and login mode.

Recommended: add an SSH key and use key-only login. It's the strongest protection, and because there's no password to get wrong, it keeps you clear of the SSH firewall that blocks brute-force password attempts.
Windows VPS has no SSH section. After deploy you connect over RDP using the Administrator password from step 2.
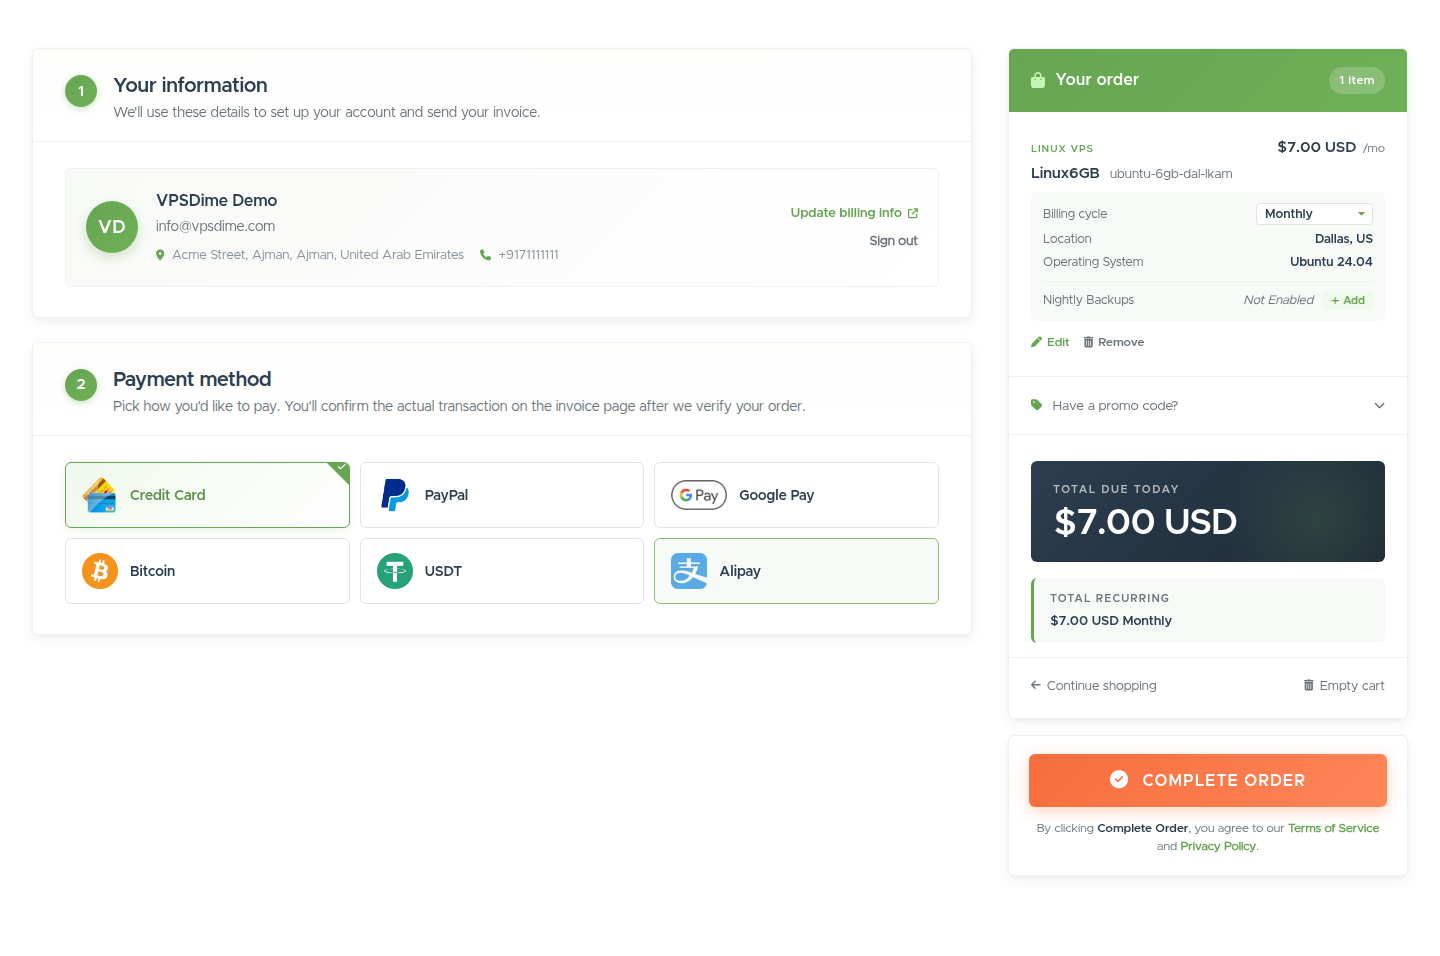
6. Pick a billing cycle and deploy
The Configuration Summary on the right shows your choices, the setup fee ($0), and the total.

- Billing cycle: Monthly, Quarterly, Semi-Annually, or Annually. A longer cycle simply pays for more months up front, and you can change your cycle later. Pick Monthly if you're unsure.
- Click Deploy Now to go to checkout and pay the invoice (with a saved card or your credit balance, if you have one). Your VPS is usually provisioned within a few minutes, and you'll get the connection details by email.
After it's deployed
The new VPS appears under My Services. Open Manage VPS to control it, and connect over SSH (Linux and Premium) with your key or root password, or RDP (Windows) with the Administrator password. Then walk your first 30 minutes on a new VPS, updates, a sudo user, and backups, before the real work starts.
Still need help?
You can open a support ticket. So we can help on the first reply, it's worth mentioning:
- which plan and location you're ordering,
- the operating system you chose,
- and any message you saw at checkout.
Related questions
- "How do I add another VPS to my account?"
- "What plan size should I pick, and can I change it later?"
- "Which datacenter should I choose, and can I move it later?"
- "Which operating systems can I choose when deploying?"
- "Should I add backups, extra storage, or an IP now or later?"
- "How do I set up my SSH key when deploying?"
- "What's the difference between the billing cycles?"
- "How long until my VPS is ready after I order?"
- "How do I connect to my VPS once it's deployed?"